How To Increase Plasmid Yield
Sometimes, plasmid purification just doesn’t go according to plan. Whether a vector is kept at low copy number, low culture density, or culture overgrowth, this guide will help you navigate your purification woes and determine the best way to boost your plasmid yields from E. coli cultures.
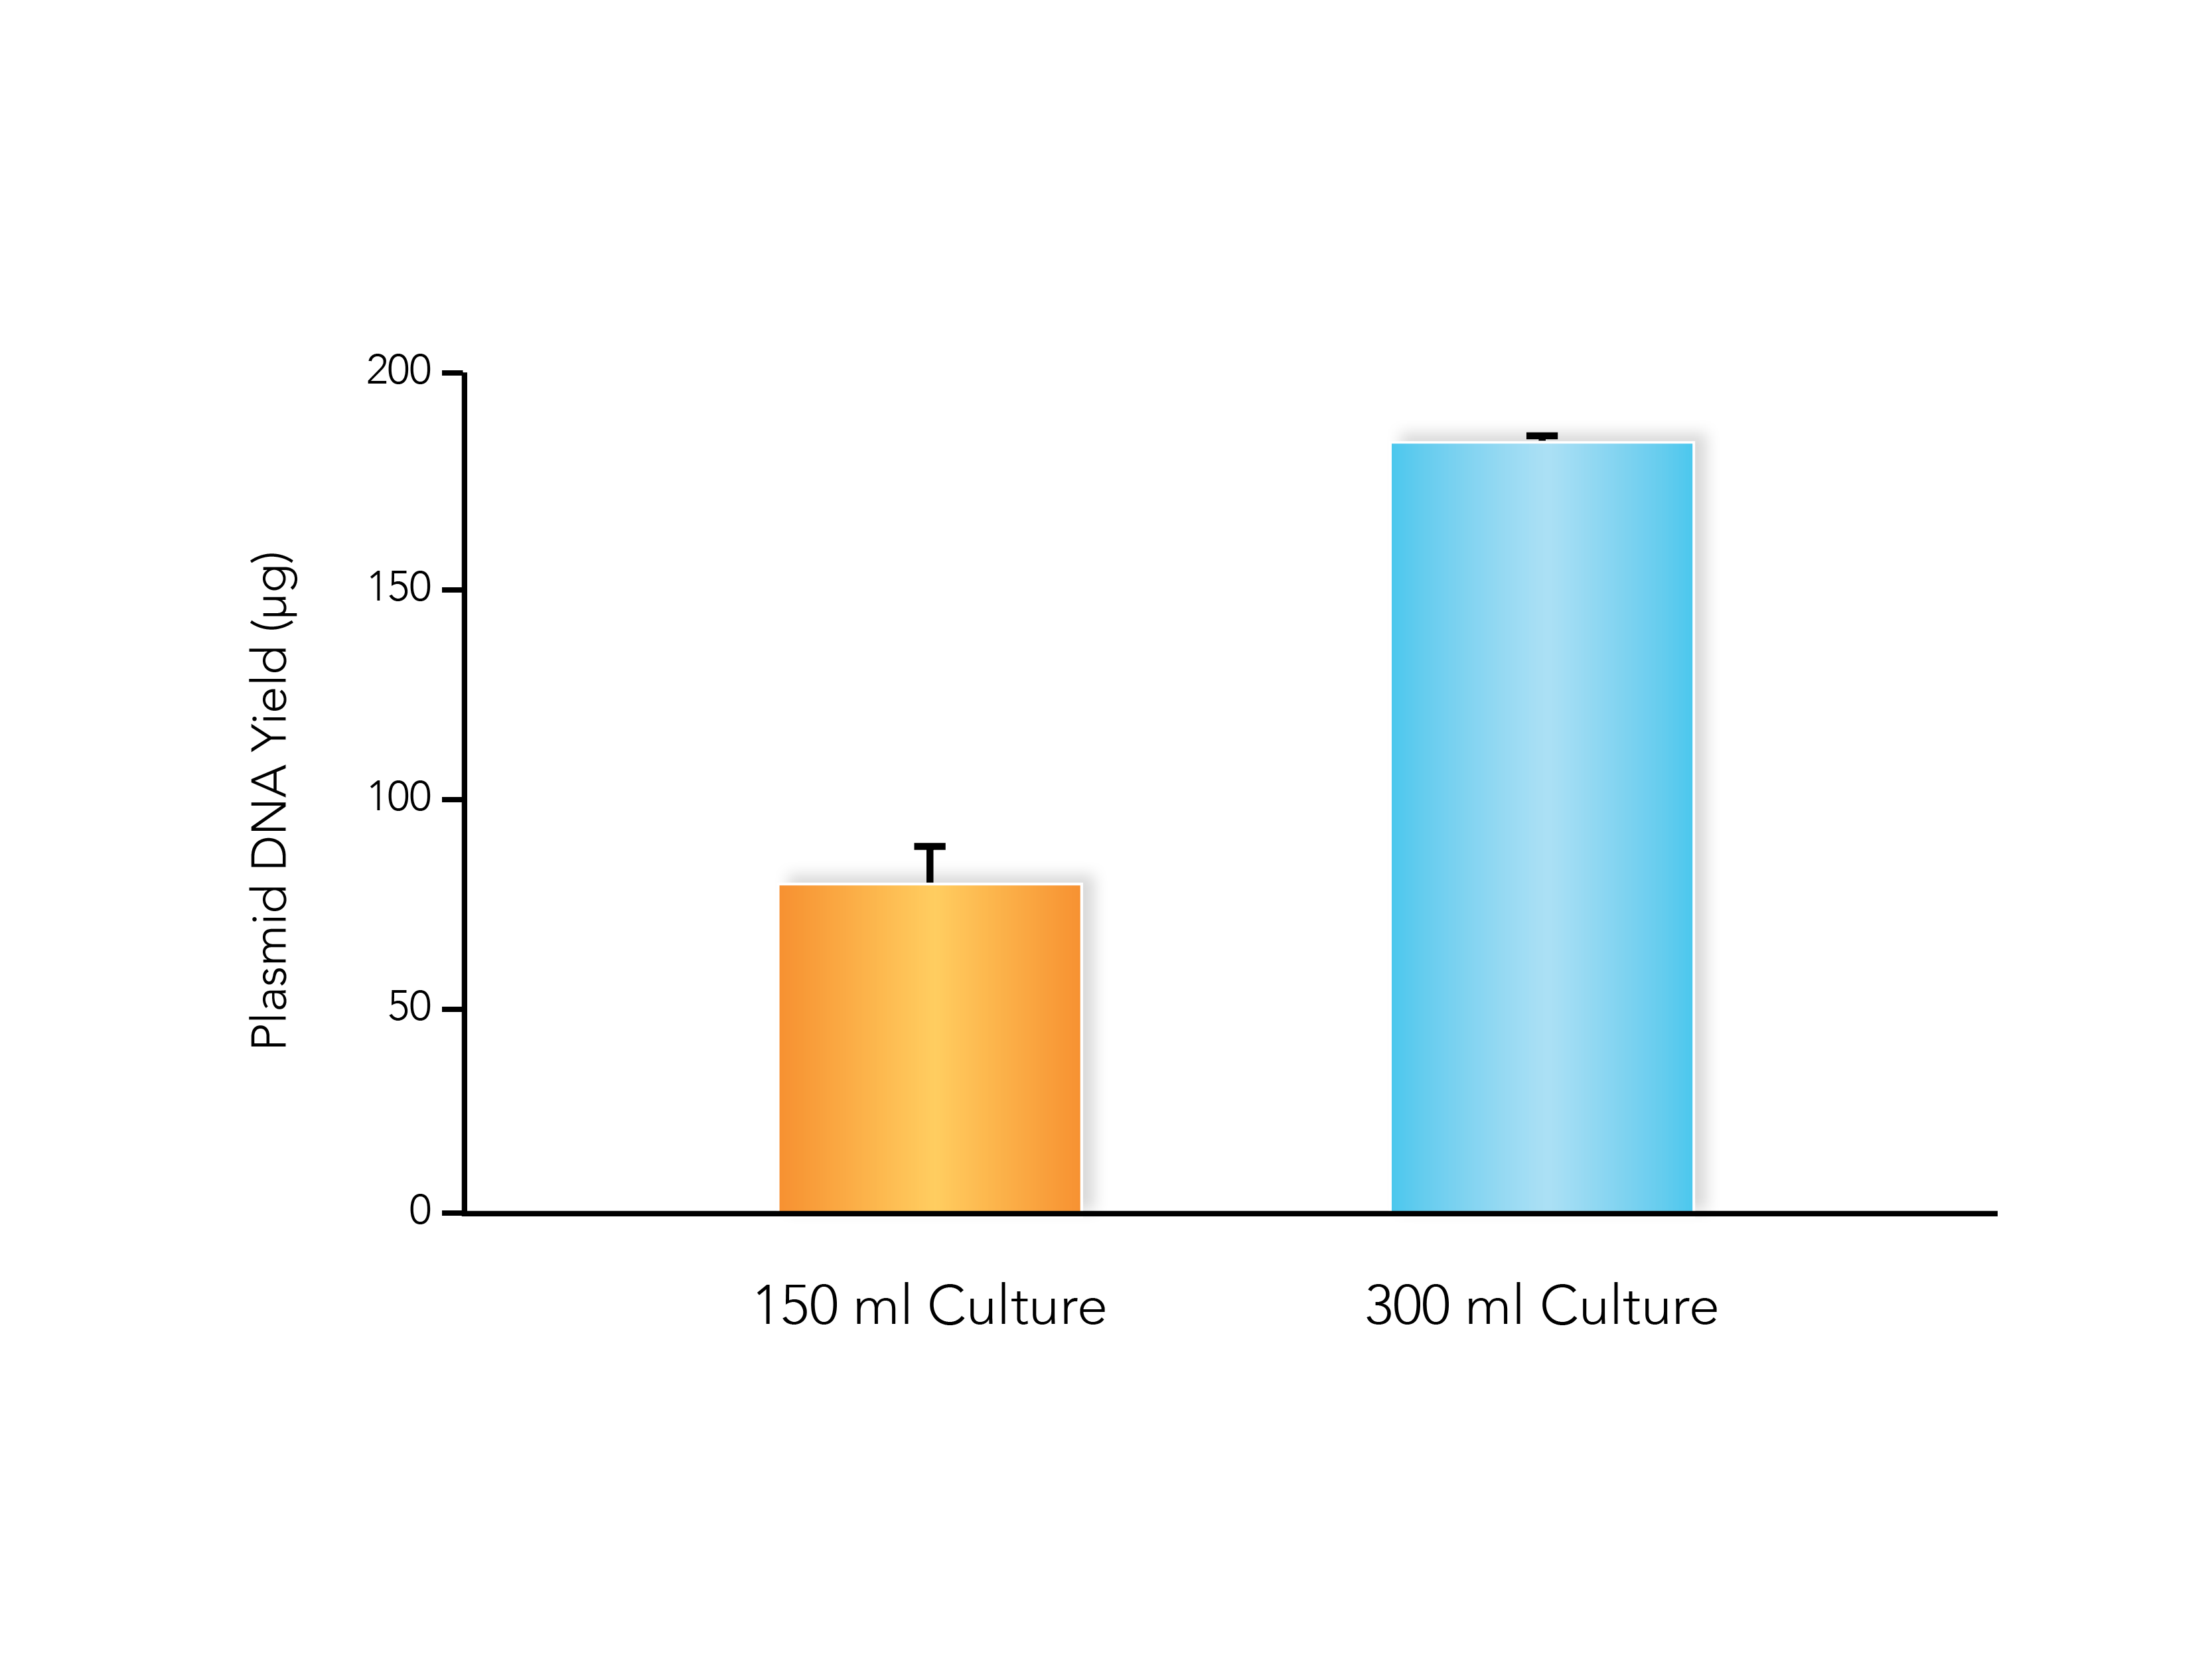
Increase the Amount of Culture Processed
Sometimes the simplest way for how to increase plasmid yields is to just input more raw material. While this is simple enough in theory, there are a few considerations to observe before you start adding more culture to your plasmid preps. Most plasmid prep kits have limitations on the amount of culture they can process, and these limitations will vary based on the copy number of your plasmid as well.
The efficacy of column-based plasmid purification doesn’t just depend on how much plasmid is loaded onto the column, but also the total amount of biomass being loaded as well. If you want to scale up your plasmid purification, try using a kit designed for high inputs of culture, such the ZymoPURE II Midipreps and Maxipreps, which can process more culture.
Optimize Your Bacteria
Sometimes particular E. coli strains are sub-optimal for plasmid extraction. If you are experiencing low yields for your plasmid prep, double check that the strain you’re using is best for plasmid propagation. Some strains are more optimized for protein expression than for efficient DNA replication. Others have unwanted byproducts, such as carbohydrates or endonucleases, which can co-purify with plasmids. When possible, stick to tried and tested strains like E. coli DH5α which contain mutations to lack certain endonucleases and increase plasmid stability. Thus, these modified E. coli strains are used as workhorses for molecular cloning and plasmid production.
Use Optimal Growth Conditions
Never inoculate culture straight from your bacterial stock. Always start with a single colony that is then grown as a starter culture. This ensures that your culture is derived from the same genotype and is not a mix of different colonies which may not have the same characteristics.
Also, be sure to double check your growth conditions. While many guides will recommend 12-16 hour cultures, every E. coli strain is slightly different in its growth rate and final density. Some require different temperatures, longer incubation times, faster shaking speeds, or more oxygenation.
For example, the maximum culture volume should not exceed 1/5 the total volume of the growth flask or alternatively, growth in baffled flasks can be used to increase aeration, and thus, culture growth. Also, take note of the shaking speed of the culture, with 200-250 rpm typical.
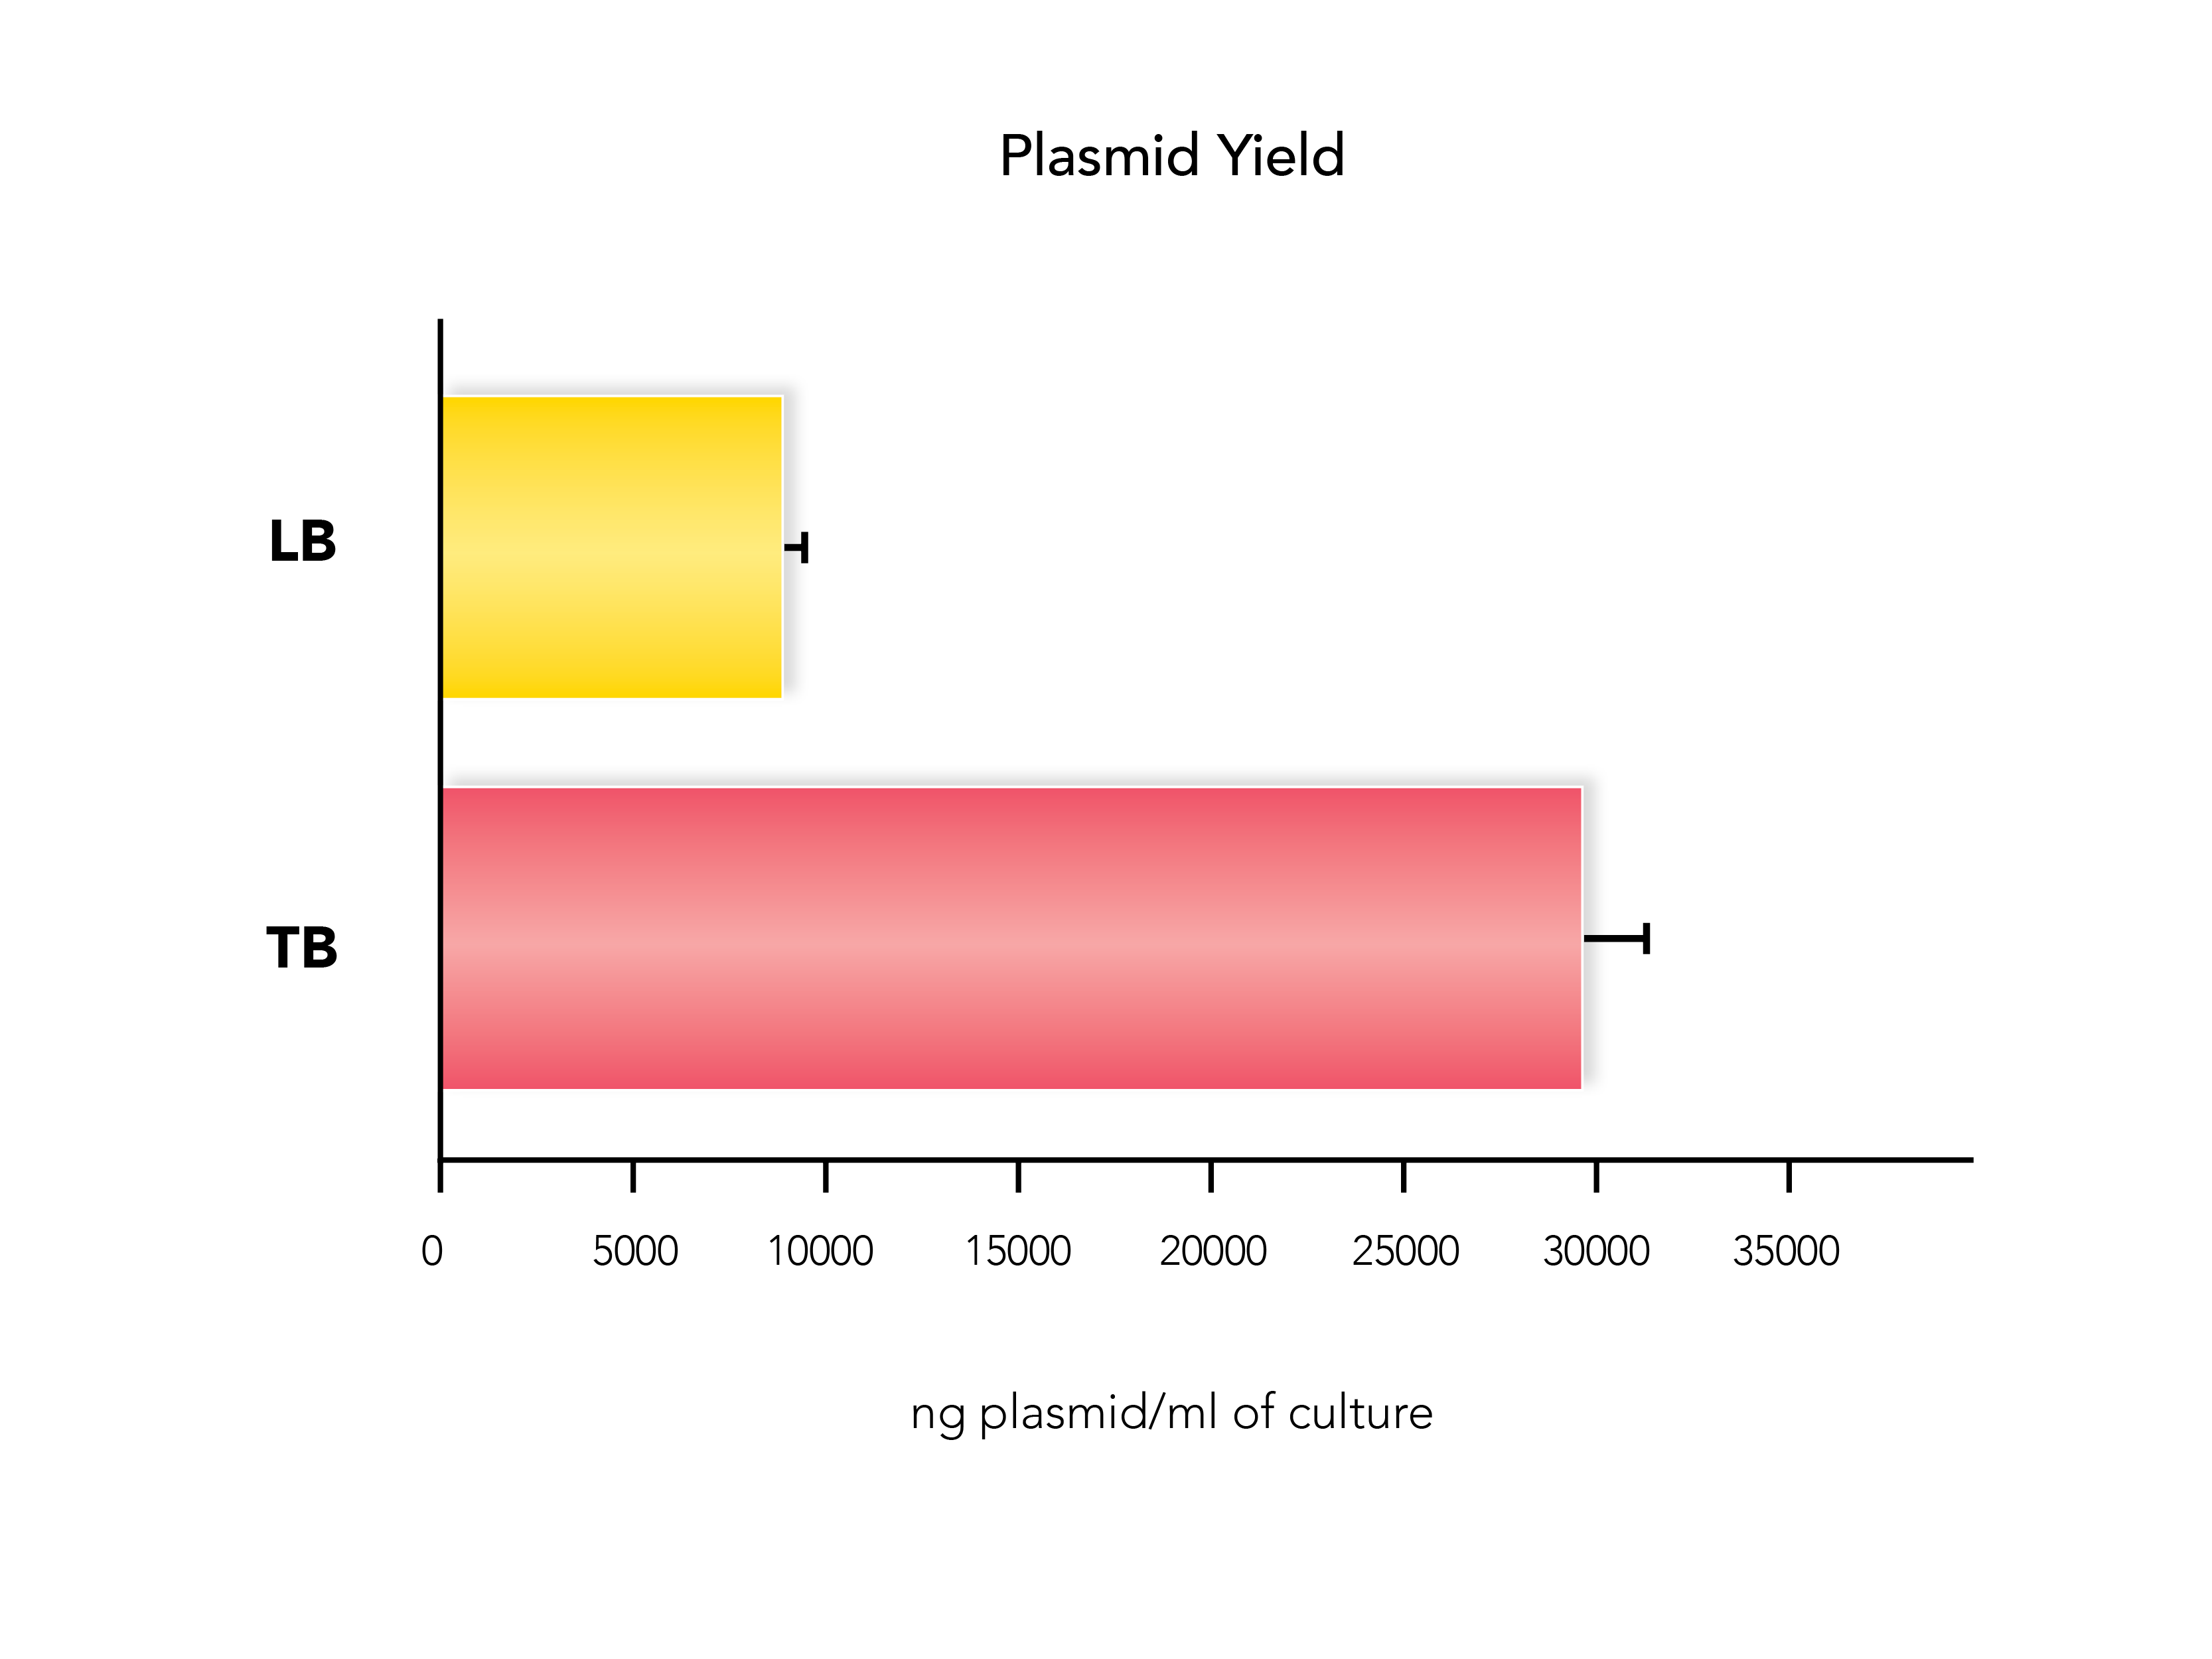
Additionally, total plasmid yield can vary depending on the type of culture broth used, typically Luria-Bertani broth (LB) or Terrific Broth (TB). Don’t be afraid to experiment with your growth conditions to see which gives you the best plasmid yield.
Optimize Selective Pressure and Yield
There are a couple ways to ensure high yield plasmid preparations from E. coli cultures by using antibiotics for selective pressure.
The first is the antibiotic selection required for any molecular cloning experiment. It’s imperative to ensure the correct amount of antibiotic is present in your culture, otherwise the lack of selection pressure will cause your culture to start to dilute out the plasmid during cell division.
The second method uses chloramphenicol, an antibiotic that halts protein synthesis and decouples it from plasmid replication, when culturing strains containing a plasmid with a relaxed origin of replication. Chloramphenicol treatment can stop protein production but allow the E. coli to continue to “amplify” the plasmids, resulting in increased yields during plasmid purification1.
One method for plasmid amplification uses an inhibitory amount of chloramphenicol (170 µg/ml) added to a culture, which is then incubated further until plasmid purification (typically the next day)2. A variation of this method that reports higher plasmid yield uses lower amounts of chloramphenicol (10-20 µg/ml) added to exponentially growing cells that are subsequently incubated overnight prior to plasmid purification3. Alternatively, another study demonstrated increased plasmid yield by growth in the presence of sub-inhibitory concentrations of chloramphenicol (3-5 µg/ml) from the time of culture inoculation until plasmid was harvested the next day4. Note that these treatments only work for chloramphenicol-sensitive cells and plasmids that do not encode for chloramphenicol resistance.
Bringing It Full Circle
Next time you’re stumped about your plasmid purification, apply these tips on how to increase your plasmid yields and optimize your experiment. Whether it be increasing the volume, changing your growth conditions, adding more selective pressure, or using the best isolation technologies, there is always optimization to be done to increase your plasmid yields!
Increase Your Plasmid Yields Today With A Free Sample of ZymoPURE:
Get Free SampleReferences:
1. Ausubel, FM, et al. Current Protocols in Molecular Biology, (2003)
2. Sambrook, J, Fritsch EF, Maniatis T, Molecular Cloning: a laboratory manual, 2nd edition. Cold Springs Harbour Laboratory Press, Cold Springs Harbour, New York, 1989
3. Frenkel L, Bremer H, Increased Amplification of Plasmids pBR322 and PBR327 by Low Concentrations of Chloramphenicol, DNA 5, num 6, 539-544 (1986)
4. Begbie S, et al., The Effects of Sub-Inhibitory Levels of Chloramphenicol on pBR322 Plasmid Copy Number in Escherichia coli DH5a Cells, Journal of Experimental Microbiology and Immunology 7, 82-88 (2005)